Monday, November 30, 2009

The Best Sandwich of the Year

My favorite part of Thanksgiving comes the day after with my all time favorite sandwich made with all the best leftovers.

First, get some fresh bread and spread on some mayo.


Next add the turkey and some salt.


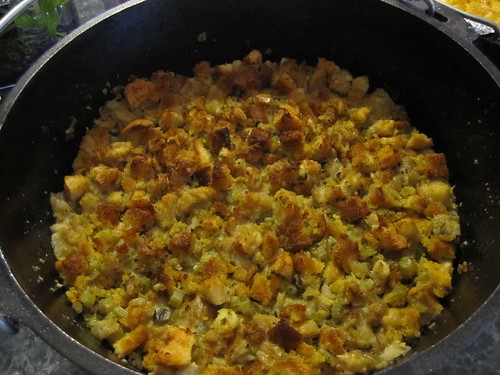
Now pile on some stuffing/dressing, whatever you want to call it, straight out of the fridge.

Yes, cold. Stay with me now.

Slice up some good cranberry sauce. Whatever kind you like.
I prefer the jellied kind and I'm not afraid to admit it.


Add the top piece of bread and slice in half and there you have it.


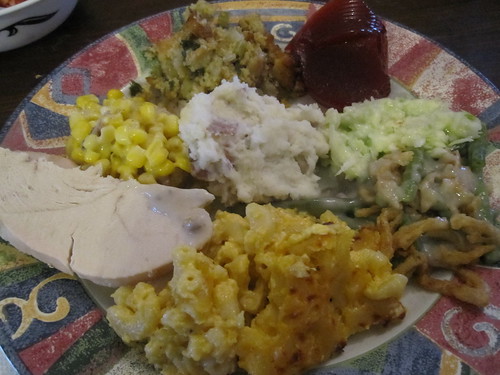
Perfection on a plate.

I can hardly wait until the day after Thanksgiving next year.

Thursday, November 26, 2009

Thanksgiving 2009

We had a wonderful Thanksgiving this year at our farm. We have so much to be thankful for, it's been a good year and we have been blessed.

We decided to try a new way to cook a turkey in the oven, we cooked side dishes over an open fire outside
, cooked a little bit on our grill, some in the microwave and some on the stovetop. So we basically used every cooking method and appliance we possibly could. And our goal was to "keep it simple" this year. Hahaha. It was worth it though and I have the jiggly stomach to prove it.

Below are some pictures of the days activities. If you are squeamish around pictures of raw poultry or high cholesterol food, proceed with caution.

The recipe we used for the turkey was discovered by my Mom and Dad in the Wilmington, NC newspaper. It is a bacon wrapped turkey and it was delicious!

My mom was the brave volunteer to loosen the skin so we could shove bacon in every nook and cranny, even under the skin.


The beautiful masterpiece in all it's glory!


We cooked 3 side dishes over an open fire using dutch ovens and a cast iron skillet: Macaroni and Cheese, Stuffing/Dressing (depending on your originating geographic location in the US) and Southern Fried Corn/Creamed Corn.

The coals on top create the oven effect and brown the top.

The fried corn was done in the skillet by first cooking some bacon.

We removed the bacon and added 1 T flour to the bacon grease and stirred. Then we added in the corn mixture of 1 lb corn, 1/2 cup milk, 1/2 cup water that had been brought to a boil.


Then we stirred until it thickened up. Actually Jason stirred, JW supervised.

To go with the creamed corn, I made grilled chipotle and corn grits cakes (grits with corn and 1 diced chipotle pepper and salt). I made them in the morning and then chilled them in a muffin pan.

Then I just grilled them on our grill for a few minutes per side.


Here are some pictures of the final products:

The star of the show, thanks to Mom and Dad for finding this recipe and Dad for being in charge of it and getting it to this beautiful finished state. It was delicious!


The mac and cheese. It was OK. I tried a new recipe and it turned out not as creamy as I like and too peppery. It sure looked good though!


The stuffing/dressing recipe I got from thePioneerWoman.com . I made this with diced french bread and homemade corn bread that I set out on my counter to dry for a few days, then added celery, onion, chopped fresh parsley, thyme, basil and chicken broth to make it moist. It was yummy!

The fried/creamed corn. It was really good too.

Here is the corn served over the grilled grits cake. It was good if you like spicy hot food, so some loved it, others didn't. Next time I will skip the chipotle peppers or cut back on them or I might use the chipotle sauce instead of the peppers themselves. I was completely making up this recipe as I went along.

A sample of some of the other items we had: mashed potatoes, coleslaw, green bean casserole, cranberry sauce. Not shown were sweet potato casserole, cranberry orange salad, yeast rolls and homemade gravy. Yeah, we kept it simple. And healthy too.


For desert we had pumpkin pie made by my mother-in-law and the cutest turkey cupcakes that my Mom and the kids painstakingly made.


All in all it was a success. I wonder why I am so exhausted?

Tuesday, November 24, 2009

Hidden Charms

I came up with an idea for a soap project since taking my soap class a few weekends ago. You may have seen the hidden treasure soaps where small toys are embedded in soap and the more a child washes their hands the faster they get to their prize. My idea was inspired by this concept. I decided to try out my idea on my Mom for her birthday. Here it is.

This is the outside.

This is the inside.


Inside of the box is a handmade charm bracelet with 3 starter charms and 3 handmade soaps. The open screen in the lid allows for the wonderful scents of the soaps to not be trapped inside.

I have never made jewelry before or taken any classes, so this was completely new to me. The jewelry aisles at the craft store can be very intimidating! I somehow managed to figure it out. I put lobster claw clasps on the charms so they could be moved around and rearranged.


Inside each soap is a hidden charm.

All charms are blinged up with some Swarovski Crystals so they are all sparkly.

The pictures do not do the soaps and charms justice.
It turns out it's hard to get a clear picture of the inside of soap. Imagine that.

There was a definite learning curve in making these soaps so the charms were visible. I had several failed attempts but by the end had figured it out.


This one is set a little too deep in the soap to be clear, but it is a really sparkly starfish.


I'm thinking about making some of these to give or sell for Christmas gifts (in my spare time, ha ha). I have many other sparkly charm themes I could use.

Again, if you are on my Christmas list, you did not see ANY of this!

Sunday, November 22, 2009

Time to Plant: Garlic


As the 2009 garden is coming to an end, our thoughts have already started to turn to 2010. One thing that I've decided to plant for next year is garlic. Garlic needs to be planted in the fall and is harvested the following fall, so requires a lot of forethought and planning and patience, which is so atypical of me on all 3 counts. I am not very good at underground type veggies that I can't see. I usually end up pulling them too early so we'll see if I can restrain myself this year. Because of this I usually plant way more than I need so I will have a prayer of getting some through to harvest.

I ordered the small Southern Growers Special from Grey Duck Garlic which includes 2 varieties of organic garlic that do well in southern climates, Thermadrome and Georgian Crystal. The Thermadrome is smaller and will have 12-20 cloves per bulb. The Georgian Crystal is much larger and will have 4-6 cloves per bulb.


The directions that came with our garlic said that it should be planted in loose soil with plenty of compost. So I decided to use my raised beds for this since the soil stays very loose because no one will be walking on it.

One thing we have a lot of is rich compost thanks to our resident 4 legged friends also known as the "hay burners".


The TripleCreek Farm gardening team got to work (me, JW and my dad).


We had to clear out the last of the tomatoes and peppers and some rogue weeds that had infiltrated.


After we added the compost, I restrung my square feet markers. I created these beds using the Square Foot Gardening method, which keeps everything organized and compact. To each square I added 1 T of Blood Meal (nitrogen rich fertilizer), about 1/2 cup of organic fertilizer, and about 1/2 cup of horticulture coarse vermiculite (helps keep moisture in the soil). I didn't really measure, I just eyeballed it.

JW volunteered to mix it all in with his favorite garden tool, the garden weasel.


The instructions said to plant the garlic 6 inches deep and 6 inches apart. This means we could plant 4 per square foot.


We even found some friends along the way.

Or I should say JW did, me not so much.


I planted 12 square feet of garlic which should yield 48 bulbs of garlic (if I can restrain myself as noted above). This should be plenty of garlic for us for next year and vampires should not be an issue around our farm.

I have almost a full bag of the Georgian Crystal and about 1/2 a bag of the Thermadrone left. If anyone would like some, just give me a holler or an email or a comment to this blog and I'll give you some (first come first served while supplies last).

Friday, November 20, 2009

Roosty's Big Day

Today was a big day. I found out this week that I was one of the Grand Prize winners in the Purina Fanciest and Funniest Chicken photo contest. We had to take our rooster "Roosty" to our local feed store for a photo shoot. Our prize was a year's worth of chicken feed. We definitely need more chickens!!

You can see more pictures of Roosty here, I think the picture of him on the skateboard or the tricycle was the winning picture (they haven't really told me yet).

The first thing we had to do was to find and catch Roosty. He came into the house while everyone was getting ready. He's always wanted to be an inside chicken, so since today was his big day, we let him come in for a minute.

Off we go. Our version of a celebrity chicken limo.

He was not impressed.
He cluck, cluck, clu-awwwked all the way to the feed store.

Since the store is right near the road, we decided to take him out of his box inside the store in case he decided to "fly the coop".

It was all very exciting.
It was about all a 5 and 6yr old, a rooster and a mommy could take.

We got a good hold on Roosty and went outside with the store owner Connie.
After awhile, keeping the kids in the pictures was not possible. They had to take "5".
When we got home we did a few more pictures.
The tree behind us is where Roosty roosts every night.
Walker and Missy also got into the action in the background.
Finally Roosty was set free.
Free to roam and revel in his day of fame.

He's probably wondering what in the heck that was all about.

(A huge thanks to my mom and dad for helping and taking pictures today! When we got in the car they both said they can't believe some of the things we get to do.)