Showing posts with label Home Cooking. Show all posts

Monday, August 16, 2010

Chocolate Chip Zucchini Bread

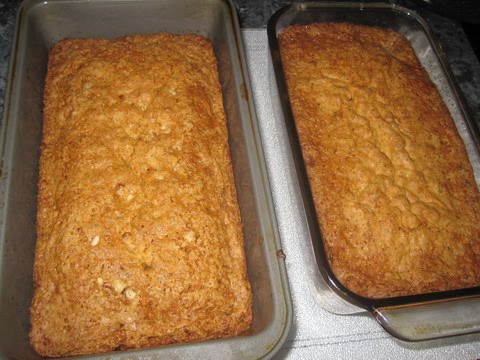
I am on a chocolate chip zucchini bread kick this summer and I have the jiggly stomach to prove it. It really is one of the easiest baked snacks/desserts you can make. It requires no mixer, you can whip it together fast, it uses typical pantry items and makes 2 loaves. You can't beat that! Also, removing the chocolate chips makes it dairy free, which is unusual for baked goods.

I use this recipe by Paula Dean, but it is a pretty typical recipe. I will cover the basic steps below, but consult the recipe for more details.

First grate up one medium sized zucchini, to make about 2 cups. I grate it by hand, it's really easy to grate.


Mix together all the dry ingredients, except sugar. I don't use nutmeg, just cinnamon. Technically you should probably sift it together, but I just don't have the patience for sifting. I've tried it, I just can't do it. Maybe I need a different sifter?


In another bowl, mix 3 eggs with a fork or whisk until they are light and airy.


Add the sugar and mix together.

Add the oil and vanilla. Mix it all together.

Add the zucchini.

Add the flour mixture.


Stir in the chocolate chips.

Pour batter into two 9" bread pans.
I have one in our family who won't eat nuts, so I mixed the nuts into only one pan.


Bake at 350 for 50 minutes or until a toothpick inserted in the center comes out clean.

You can eat one and freeze the other, or you'll be surprised how fast both loaves will disappear.


You will love this and kids will too.
And they won't even notice that they are eating a vegetable.

Tuesday, March 9, 2010

Jurassic Brownies

Tomorrow JW turns 7 so tonight I am making some treats for his birthday snack at school. I decided to make dinosaur shaped brownies using my favorite way to make brownies adapted from a recipe I found in Southern Living. Peanut butter streusal brownies... they are awesome!


Here's how to make them:

Make the batter for a 13x9" pan of brownies according to package directions (I like Duncan Hines, but Pillsbury is good too). Pour the batter into a greased 13x9" pan.

In a small bowl mix until crumbly:

1/2 cup flour
2 T brown sugar
2 T granulated sugar
1/3 cup peanut butter
2 T melted butter
1/8 teaspoon salt

Sprinkle mixture over brownies. Bake according to package directions, maybe slightly longer. Cut into whatever shape you prefer but we recommend dinosaurs!

Monday, February 22, 2010

Bagels and Bagel Dogs

A few years ago I found a good recipe for homemade bagels in Light & Tasty magazine. They are really not hard to make, a little time consuming (waiting for them to rise) but each step is easy. And the waiting for them to rise part, just means the recipe comes with built in rest breaks. So that's nice, isn't it? Kids can help too, they can put their play dough snake making skills to good use.

When I was growing up, we used to get "Bagel Dogs" at a local bagel shop. I used to love them so I decided to make them myself. This recipe makes the Bagel Dogs plus some extra bagels for breakfast the next day. Even my husband likes these bagels and he usually thinks eating bagels are like chewing on a spare tire.

Before I begin, I must warn you that this recipe requires parchment paper. Parchment paper has always been the Achilles heal of my cooking. I have a bad habit of not reading through a recipe completely before I dive into making something. I check the ingredients, if they seem reasonable, I get them and off I go. That's how the parchment paper gets me every time. It's never listed in the ingredients. They sneak it in, usually toward the end of the recipe, when I'm in too deep to turn back and I usually do not have it on hand. I think there should be some sort of recipe rule to list parchment paper in the ingredients. Because parchment paper has gotten me so many times, I'm obviously too set in my ways to change MY behavior.

Anyway, I've got some unresolved issues to work out, but here's how to make them.

First dissolve 1 Tablespoon active dry yeast in 1 1/4 cups warm water (110 to 115 degrees)


Add 3 tablespoons canola oil, 3 tablespoons sugar, 3 tablespoons honey, 1 teaspoon brown sugar, 2 teaspoons salt, 1 egg. Stir to combine.


I modify the original recipe by using 1 cup whole wheat and 3-4 cups bread flour.


Add enough flour to make a dough.


Knead the dough on a floured surface for about 5-10 minutes until the dough is smooth. This is a great way to de-stress.


Cover with a dish towel and let it and yourself rest for 10 minutes.
After you've rested, divide the dough in half. Divide one half of the dough into 5-6 sections.
Roll each section into a 10" long rope and form into a circle. Pinch to seal the ends together.

Divide the other half of the dough into 4 sections.
Flatten each section and wrap around a hot dog.

Cover and let them and yourself rest for 20 minutes.
(Sorry to disturb you but after about 10 minutes put a large pot of water on to boil and turn the oven on to 425 degrees)


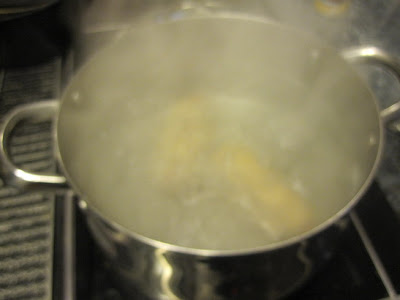
Place the bagels and bagel dogs into the boiling water 2-3 at a time. Boil for 45 seconds, and then turn them over and boil for 45 more seconds. Use a spoon to make sure they don't stick to the bottom. Note: it's really hard to get a picture of boiling water!

Remove them from the boiling water with a slotted spoon and place them on a baking sheet lined with parchment paper, 2" apart. Sprinkle with toppings such as sesame seeds, minced onion, kosher salt, poppy seeds, etc. I'm not a fan of poppy seeds, but I used all of the others.

Bake at 425 degrees F for 12 minutes.
Then turn over and bake for 5 minutes more.


Some pictures of the final products. Yum!


These pigs are really toasty in their blankets.

Thursday, February 18, 2010

30 Minute Mozzarella

Did you know that in 30 minutes you can make homemade fresh mozzarella in your own kitchen? It is great fun for kids and they finally get to see what these "curds and whey" are that they keep reading about.

I ordered my supplies from the New England Cheesemaking Supply Company CheeseMaking.com They have a homemade mozzarella kit that has everything you need to make mozzarella (and other cheeses as well)
.

Here are the steps that are provided with the kit.

Dissolve 1/4 rennet tablet in 1/4 cup cool, chlorine free water.

Dissolve 1 1/2 teaspoons citric acid into 1 cup cool chlorine free water.


Make sure your milk is not ultra pasteurized.
It can be skim or whole or a mixture.
I also like to use hormone free milk because only very rarely can I find mozzarella in the stores that states that it is hormone free.


Pour 1 gallon of milk into a large pot.


Stir constantly as you add the citric acid solution.


Stir constantly and heat to 90 degrees F.


Pretend like this says 90 degrees. Oops. This is where I start saying things like my thermometer must be at least 4 degrees off.

Remove the pot from the burner and slowly stir in the rennet solution with an up and down motion for approximately 30 seconds.


Cover the pot and leave it undisturbed for 5 minutes.


The curd should look like custard and clearly separate from the whey.
If the curd is soft or the whey is milky let sit for a few more minutes.


Cut the curd with a knife (I don't have a picture of this).
Place the pot back on the stove and heat to 105 degrees F while slowly moving the curds with a spoon.


Take off the burner and continue to slowly stir for 2-5 minutes.


Ladle the curds into a large microwaveable bowl, draining off as much of the whey as you can without pressing the curds too much.


Microwave for 1 minute.
Put on rubber gloves. The first time I tried this I didn't have rubber gloves, and used latex instead. This is not recommended. It is very hot!! Gently fold the curds into one piece.
Add cheese salt to taste. So far I've tried 1 Tablespoon which was too much and 1 teaspoon was too little.


Microwave for another 30 seconds. Drain again and stretch the curd. It must be 135 degrees to stretch properly. If not hot enough, microwave for another 30 seconds.


Stretch the cheese by pulling like taffy until it is smooth and shiny.
The more you work the firmer it will be.
Shape into your desired shape (ball, log, braid, string cheese, etc)


Submerge in ice water.
This step protects the silky texture and keeps it from becoming grainy.


The final product. Slice or shred and Enjoy!

Wednesday, February 17, 2010

Sweet Potato Black Bean Empanadas

Whenever I make Chicken Pot Pie with a Sweet Potato Crust, I always steam an extra sweet potato or two so I can make a few extra pie crusts to make empanadas. I made them tonight and you know your family likes something when they start talking about selling them and how much they should be and by the end of the meal they have an entire business plan worked out.

The kids are minimalists, so I fill theirs with cheese only, but for the grown ups I fill them with a black bean and corn mixture that is delicious.

I need to add the disclaimer that these are not the easiest things to make. But once you taste one, it will motivate you to make them again. Of course I think any recipe that requires a rolling pin is not easy.

The key is to keep the pie crust dough cold. I usually make the pot pie and put the extra pie crusts in the fridge for a few days until we are ready for the empanadas.

Make the filling first so it has time to cool.

In 2 T of oil in a large skillet over medium heat, cook onion until translucent.


Add 1 can black beans, drained and 1/4 teaspoon cayenne or chipotle pepper.
Stir and heat for 1 minute.


Slightly mash beans with a fork.
This is where it starts to not look so good, but stick with me.


Add about 1 cup corn. Stir to combine.
If it was up to me I would add some cilantro at this point.
But Jason is not a fan of cilantro, so I left it out.
Allow the mixture to cool.


On a floured surface, roll the pie crust into a 12"x12" square, about 1/8 to 1/4" thick.

Note I actually had 2 pie crusts for the amount of filling above and still had some leftover. I saved it for quesadillas or burritos. One meal keeps leading into the next.

Divide the square into 9 equal squares.


Transfer each square to a baking sheet.
Work quickly before the dough gets warm.

Add 1 teaspoon of the cooled bean mixture to each square.
Cover with about 1 tablespoon of shredded cheese.

Fold over diagonally and crimp to seal.

Bake at 425 for 15 minutes. Serve warm.


Sweet Potato Black Bean Empanadas

1 recipe Sweet Potato Pie Crust
2 T oil
1/2 medium onion diced
1 cup canned black beans, drained
1/8 teaspoon cayenne or chipotle pepper
1/2 cup corn
1/4 cup chopped cilantro (optional)

In a skillet, cook onion over medium heat until translucent. Add black beans and pepper. Stir and heat for 1 minute. Mash beans slightly with a fork. Stir in corn. Allow mixture to cool.

Roll out pie crust dough to a 12" x 12" square. Equally divide into 9 squares. Transfer to a baking sheet. Add 1 teaspoon of cooled bean mixture to a corner of each square and top with 1 T shredded cheese. Diagonally fold opposite corner over to form a triangle and crimp the edges.

Bake at 425 for 15 minutes. Serve warm.